5 Tips for Taking Project Photos that Sell
Avg. Read Time: 5 min, 46 sec
The Ground Work
Short on time? Here are this article’s key takeaways…
Document the full journey. Capture projects from site prep through completion to create compelling before-and-after stories that help owners, contractors, engineers, and dealers see what’s possible.
A small invest in image quality can go a long ways. An investment in an entry-level DSLR camera unlocks billboard-, print-, and ad-ready photos that quickly pay for themselves.
Show scale and professionalism. Include crews, equipment, lighting awareness, and clean jobsites to communicate performance and credibility.
Organize and share consistently. Preserve high-resolution files and submit strong projects to Aster Brands (photos@asterbrands.com) to increase visibility and support industry growth.
Strong project photography does more than document completed work, it builds credibility, supports contractors, attracts new customers, and strengthens your brand’s reputation. The right photos help dealers sell, assist engineers in understanding applications, and allow marketing teams to turn real projects into powerful stories. If you produce Redi-Rock, Rosetta Hardscapes, Pole Base, or Novum Wall, consistent project documentation is one of the most valuable contributions you can make to both your own business development efforts and to the wider network.
But let’s be honest. You and your team are precasters, not photographers. No worries. You don’t need a visual arts degree or a $5000 camera to snap great project shots. It just takes a little forethought and some planning. These five strategies will help you capture photos that make a difference for you and your industry. And most importantly, help sell more of your solutions.
#1 – It’s the Journey, Not the Destination
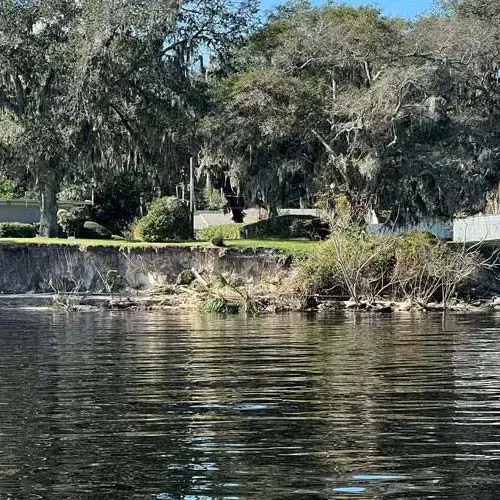
Completed project photography matters–especially for precast construction projects, but progress images deliver the strongest storytelling value. A compelling before-and-after comparison, along with documented milestones, helps a project owner better envision the potential outcome of their project. This is a great time to mention the importance of coordinating early with contractors so they can notify you when key milestones occur. You can both sweeten the deal and further cement your working relationship by offering them the use of photos for their purposes.
Prioritize capturing your projects in stages:
- Existing site conditions
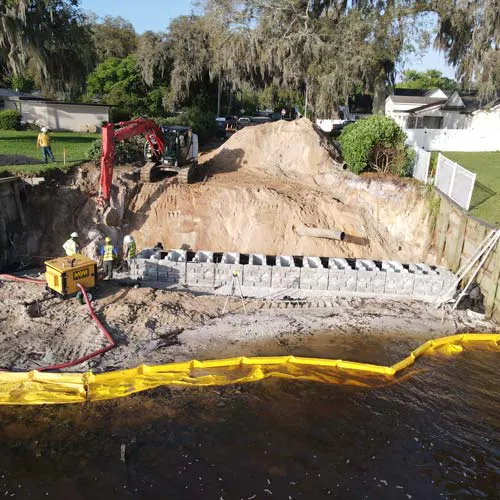
- Excavation and base preparation
- First course placement
- Reinforcement or engineering details
- Mid-construction progress
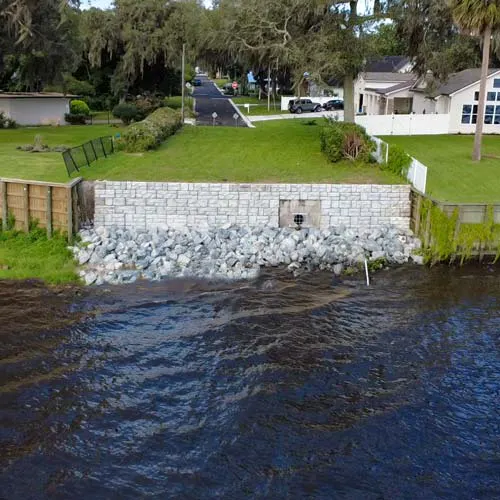
- Near completion
- Finished installation
- Post-installation enhancements
Remember, different audiences look for different things when they're viewing projects. Don’t forget to capture photos with the following in mind:
- Project owners want to see what’s possible with your products.
- Contractors want installation insight.
- Engineers want technical proof.
- Dealers want performance examples.
In addition to providing complete documentation of a project, a comprehensive visual timeline significantly increases the likelihood that your project could be selected for an Aster Brands case study or project spotlight. More on this later.
#2 – Invest in a DSLR and Turn Every Project into a Premium Asset
If project photography is going to support your sales, marketing, and long-term brand growth, it deserves more than convenience-level effort. A digital single-lens reflex (DSLR) camera is one of the most practical, high-return investments a producer can make. That investment pays dividends because DSLR images:
- Hold up in billboards and large-format signage
- Maintain clarity in print ads and brochures
- Scale beautifully for digital ads and websites
- Provide flexibility for cropping and layout design
- Deliver sharper detail for technical documentation
In short, you’re no longer limited by image quality. Your photos become usable in virtually any marketing capacity. As for expense, a quality entry- to mid-level DSLR setup costs $300–$600, a lot less than hiring a professional photographer for two or three projects.
Consider the lifecycle of one strong, well-photographed project. Your project could be:
- Featured on your website
- Included in a dealer brochure
- Shared on social media
- Submitted for a case study
- Used in presentations with engineers
- Printed in large-scale signage
If just one of those placements contributes to a new project, your camera has already paid for itself. Compared to ongoing photographer fees, investing once in your own equipment gives you control, flexibility, long-term cost savings, and you learn a new skill!
If you’re not able to invest in a DSLR camera right now, modern smartphones can get the job done... barely. Minimal effort yields minimal rewards.
- You drastically limit how your images can be used.
- Poor quality images can play a part in turning customers away.
Still want to use your phone? To get the most from your phone camera, here are a few tips:
- Use maximum resolution settings. Avoid reduced-size image modes that limit print flexibility.
- Avoid using digital zoom. Move closer instead, and capture both wide and detail shots.
- Tap to focus and adjust exposure. This prevents dark shadows or blown-out surfaces.
- Clean the lens before shooting. It might seem silly, but dust and fingerprints can easily get on your lens.
Whether you invest in a DSLR or not, treat project photography as a strategic business tool and not an afterthought. The quality of your images directly impacts how confidently your products are presented, shared, and sold.
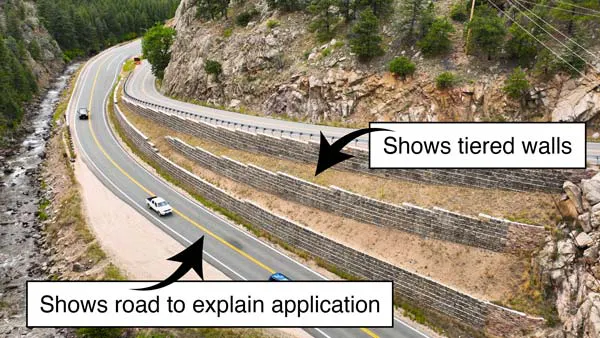
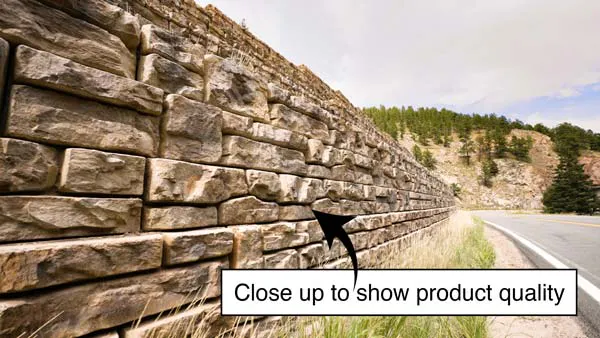
#3 – Show Scale, Context, and Environment
A technically impressive project can look ordinary without context, and it’s up to you to make sure the bells and whistles that made the effort special aren’t overlooked. Getting photos of mechanical operators, equipment, and installation crews helps communicate size, engineering performance, and real-world application without much explanation. Be sure to step back before shooting whenever possible. Wider photos often become the most useful for brochures and presentations.

#4 – Pay Attention to Lighting, Composition, and Professionalism
Lighting and composition often matter more than camera quality. Composition is the intentional arrangement of visual elements, including subjects, lines, shapes, and lighting, within the frame to create a clear, balanced, and engaging image.
Don’t sweat this step. It sounds more daunting than it really is. You’re not attempting to organize a family photo with three beagles, two cats, and a five-year-old who just chugged a two-liter of Mountain Dew. Here’s a handful of suggestions that will help you get great-looking project photos without losing your mind:
- Shoot both horizontal and vertical photos (But more so horizontal. It's hard to take good pictures of retaining walls vertically.)
- Photograph early morning or late afternoon when possible.
- Keep the sun behind you.
- Take advantage of cloudy days for even lighting.
Also consider how the jobsite appears. Ensure PPE (Personal Protective Equipment) is visible when appropriate and remove debris before final shots. Generally, just avoid cluttered or unsafe scenes. Clean visuals communicate professionalism and quality workmanship.
#5 – Organize Photos So They Create Opportunity
Just like a good joke, even the best project photos lose their impact if they can’t be shared. Here are a few tips for keeping your project photos close at hand and available when you need them:
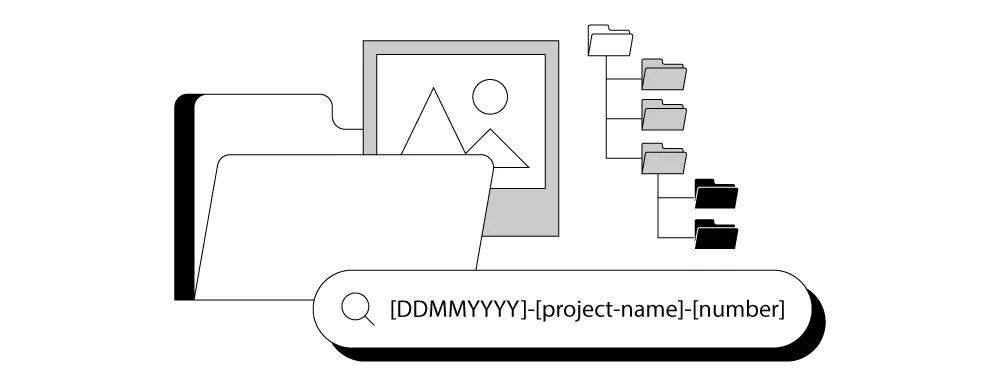
- Develop a folder structure that’s scalable. A folder tree example could be Product > Year > Project Name.
- Coming up with a file naming system is vital for searchability and clarity long-term. [DDMMYYYY]-[project-name]-[number] (03172026-Johnson-Home-1) is an example.
- Save images in full resolution.
- When sharing images use .zip to preserve image quality or share a link of a folder from your storage platform (and set permissions accordingly). Dropbox and Google Drive are examples of storage platforms.
- Don’t share images via screenshots or through messaging platforms that reduce file quality.
- Keep original files unedited.
Everyone has their own preferred method of organization, so find one you like and stick with it. Consistent application of your methodology is the key to making it easy to find the before-and-after photos of the amazing three-tiered parking lot retaining wall you supplied two years ago.
Bonus Tip: Share Your Wonderful Work
Remember when we mentioned case studies and project spotlights earlier in this article? It’s time to talk more about that. We won’t beat around the bush. There’s nothing we like more than featuring the amazing projects being created with your products. Seriously. Our copywriters love writing about them. Our graphics and web folks love laying out the webpages and sharing them on social media, and our business consultants love showing other producers, designers, installers, and project owners what’s possible with your solutions.
Submitting your project photos and details to Aster Brands elevates your company’s visibility locally while also advancing the precast industry. Your photos help us create compelling case studies and project spotlights, but they also serve as complementary content for brochures, sell sheets, technical documents, design resources, and industry education materials.
Submitting project photos is as simple as sending us an email! Email your project photos as a .zip or link to photos@asterbrands.com and include the following information:
- Name of project (example, “Hartford Commercial PC Wall”)
- Project Location
- Project Size (wall height/length or patio square footage)
- Year Completed
- Products Used
- Textures (if applicable)
- Manufacturer
- Project Owner
- Designer (if applicable)
- Installer (if applicable)
We’d also appreciate your sharing anything unique about the project, such as special site challenges or creative product customizations.
Just remember, project photography isn’t about artistic perfection; it’s about intentional storytelling. Document projects from start to finish. Show scale and installation detail. Pay attention to lighting and composition. Organize and share files consistently. Do this well, and every installation becomes more than a completed job. Great project photos become a sales tool, a credibility builder, and a lasting marketing asset that supports contractors, dealers, and the entire network.

Contributing Expert
Greg Manning
Graphics Greg, some call him, has spent 10+ years mastering and diversifying his skills in graphic design. Design, to him, isn’t just about making things look great; it’s about creating with a purpose. Design that solves problems is what Greg lives for. When not creating, he enjoys playing RPG video games like Skyrim and Zelda while observing their UI.